
how to add instagram feed in wordpress?
Embedding your Instagram feed to your WordPress site means people can easily interact with you on both platforms.
This way, you can easily boost your brand awareness, sales, and conversions. After all, cross-promoting your social networks on your website improves your audience reach and engagement.
But figuring out how to add your Instagram feed to your WordPress website isn’t as easy.
So today we’ll show you how to embed your Instagram feed on WordPress. By following this tutorial, you can grow your audience and increase sales for your business using your Instagram content.
How to Embed Instagram Feeds With a Plugin
The easiest way to embed an Instagram feed to WordPress is to use a WordPress plugin. This way, the plugin can just connect with Instagram’s API to help you easily display Instagram feeds on your website — even if you’re not tech-savvy. By using a trusted WordPress plugin, you can showcase your feeds in all their glory, without having to worry about dealing with embed code, HTML, Custom CSS, JavaScript, or other coding languages. For this method, we’ll show you how to add an Instagram feed to your site using the Instagram Feed Pro plugin from Smash Balloon. As the highest-rated Instagram feed plugin for WordPress, it lets you display completely customizable Instagram feeds on your site in under 10 minutes! And with zero technical knowledge needed to get up and running, your feeds look great right out of the box. This way, your feeds look consistent with your brand’s design, with minimal effort on your part.Step 1: Install and Activate Instagram Feed Pro
As the highest-rated Instagram feed plugin for WordPress, it lets you display completely customizable Instagram feeds on your site in under 10 minutes!
And with zero technical knowledge needed to get up and running, your feeds look great right out of the box. This way, your feeds look consistent with your brand’s design, with minimal effort on your part.
The best part? Since the plugin’s built with users in mind, it’s designed to be ultra fast. That’s why the pro version of Instagram Feed is trusted and happily recommended by over 1 million users worldwide!
Step 2: Create a New Instagram Feed
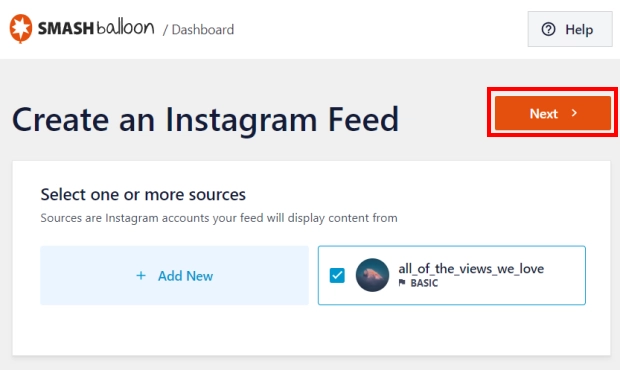
The next step is to create a new Instagram feed for your site. To do that, head to Instagram Feed » All Feeds from the WordPress admin area.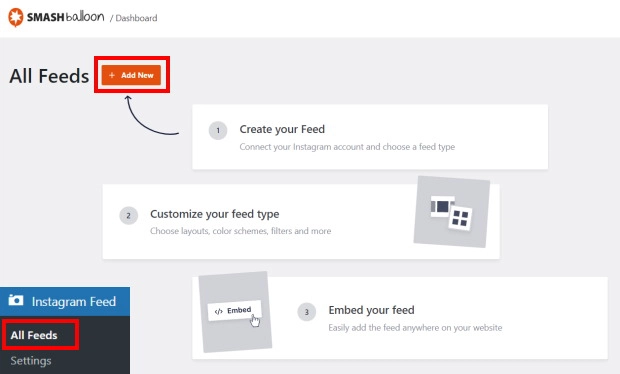
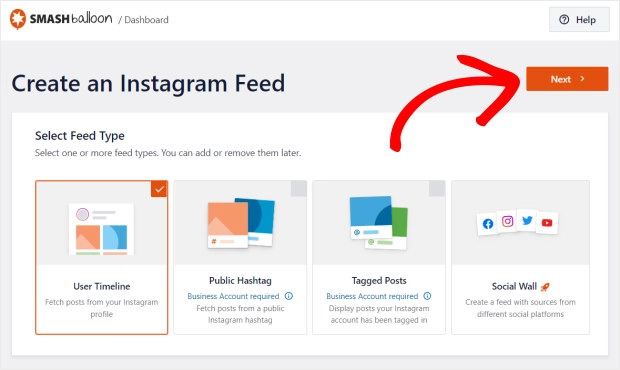
Next, you can choose the type of Instagram feed you want to embed. You get 3 options to pick from here:
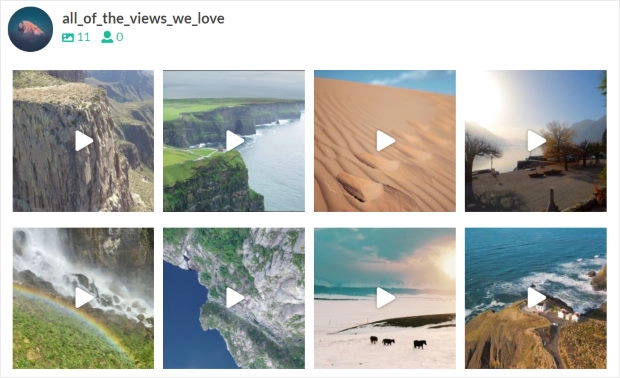
- User Timeline: Show photos and videos that you’ve posted on your Instagram profile
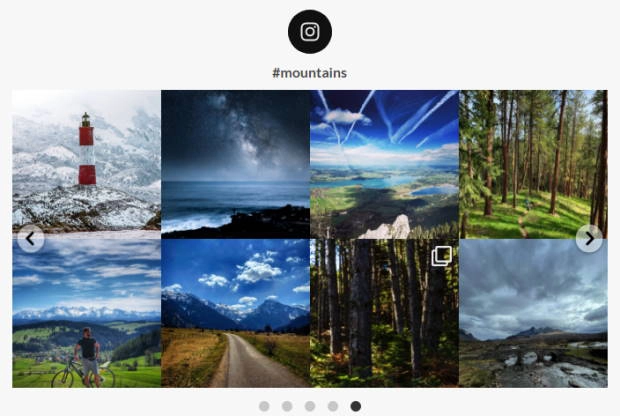
- Public Hashtag: Display Instagram posts with your chosen hashtags
- Tagged Posts: Embed posts where other Instagram users have tagged you
Plus, you can even select multiple options and create a feed that combines different feed types.
To continue, just select the feed types that you prefer and click on Next.
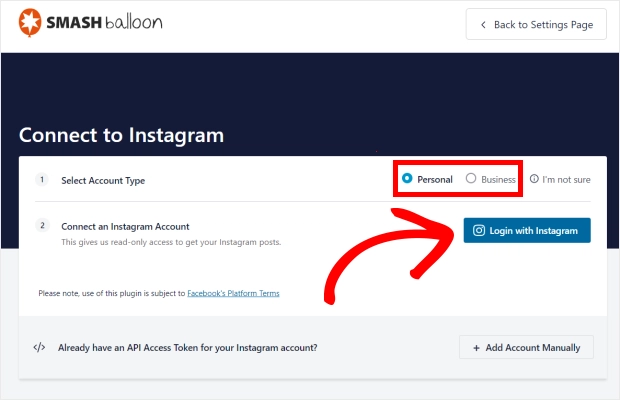
Step 3: Connect Your Feed to Instagram
To show Instagram posts on your website, you can connect the feed to your Instagram account first. Since Instagram Feed Pro asks for read-only access to your account, the plugin can only view your content and won’t be able to make any changes.First, click on the Add Source button to get started with connecting your feed to Instagram.

After that, you can pick between a personal Instagram account or a business account
With a personal account, you can use all the features you’ve regularly used on Instagram. For your new feed, you can display posts from your own Instagram account only.
On the other hand, a business account gives you advanced features like analytics and a contact button.
After selecting your account type, click on the Login with Instagram button.
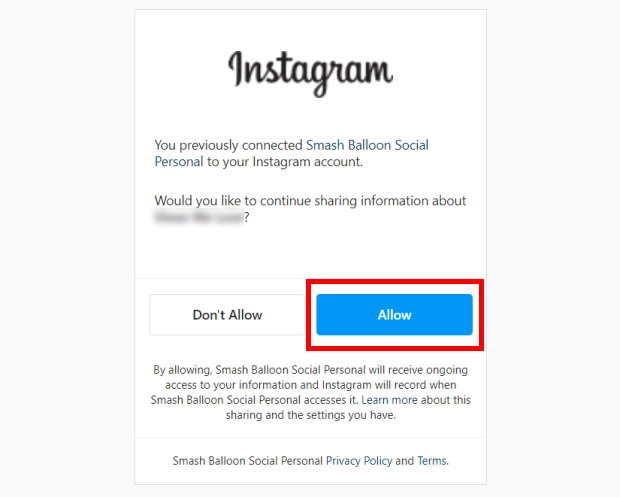
To continue, you can confirm that you want to connect your Instagram account by clicking on the Allow button.
The plugin will now bring you back to your site so you can connect your Instagram account as the source for your feed.
To do that, just click on the Next button.
Just like that, you’ve created a new feed and connected it to Instagram. You can now go to step 4 and customize the design of your new Instagram feed.
Step 4: Customize Your Instagram Feed
Once you connect your feed to Instagram, you can use the live feed editor to customize it.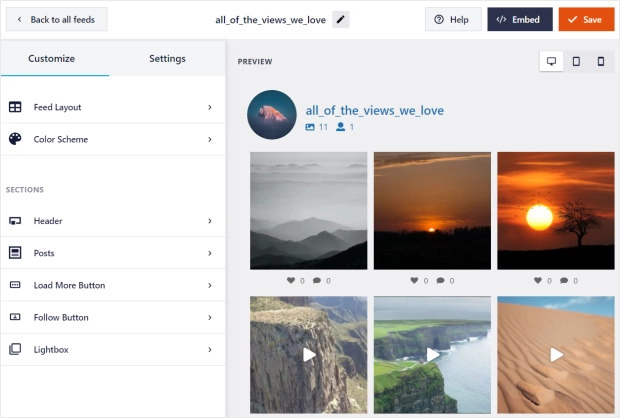
Here, you can find all of your customization options on the left side. Using these options, you can change the feed layout, color scheme, post style, header design, and much more.
Towards the right, you can see a live preview of your Instagram feed. You can see all the changes you make in real-time here.
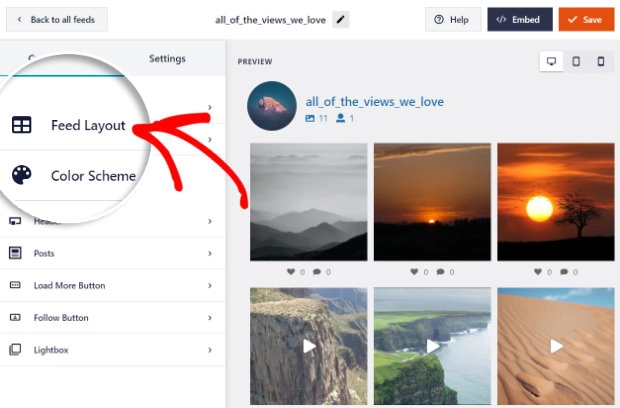
To start the customization, you can select the Feed Layout option from the left.
For your Instagram feed, there are 4 options that you can pick from: Grid, Carousel, Masonry, and Highlight.
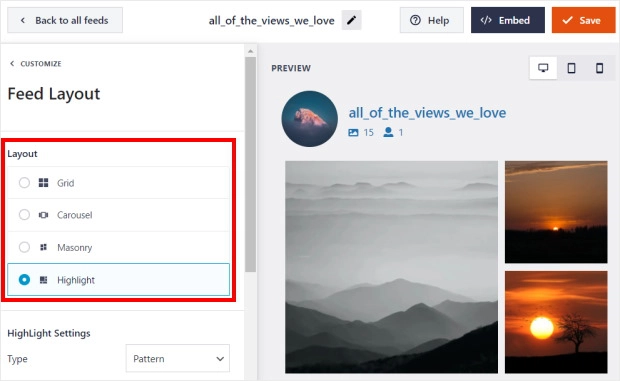
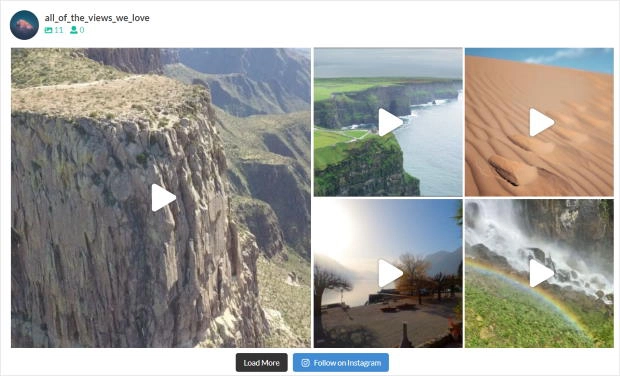
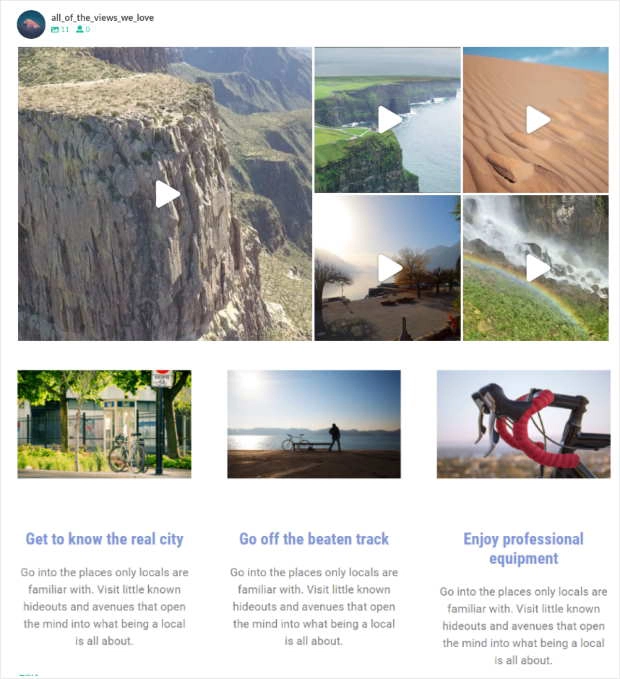
The first option is the grid layout which shows Instagram posts in rows and columns. Plus, all of your posts are cropped to the same size so they look clean and uniform.
With this layout, you can show lots of Instagram content on your site at once.
After that, you have the masonry layout which shows Instagram posts in different columns.
You can use this layout to embed photos and videos with their original proportions.

In fact, you can increase the size of your photos and videos by 4 times with this layout.
Once you pick your layout option, click on Save.
To proceed, click on the small Customize button and go back to the main customization options.

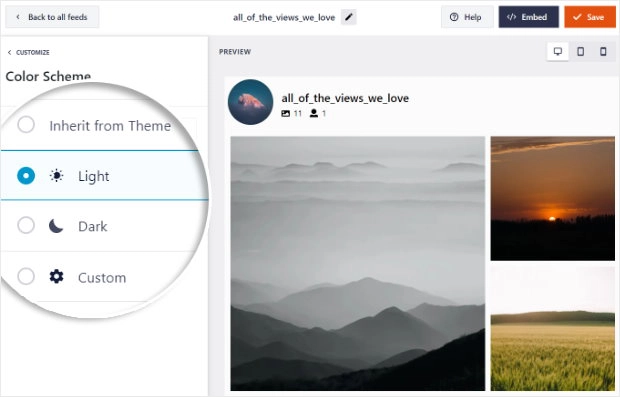
For the color scheme, you can choose from 4 different options:
- Inherit from Theme: Copy the colors of your website for your Instagram feed
- Light: Show an Instagram feed with a lighter background and dark font color
- Dark: Pick a darker background and a light font color for your feed
- Custom: Manually select all the colors of your Instagram feed yourself
Step 5: Embed Instagram Feed on Your WordPress Website
Embedding your Instagram feed in WordPress is pretty straightforward using this plugin. In fact, there are 2 ways you can embed your Instagram feed:- Embed your Instagram feed on a WordPress page
- Embed your Instagram feed on your WordPress sidebar or footer
Embed Your Instagram Feed on a WordPress Page
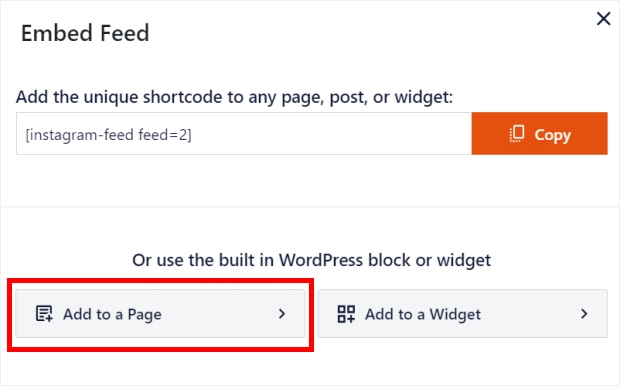
First, let’s see how you can display your Instagram feed on a page of your WordPress site. To begin, click on the Embed button in the top right corner.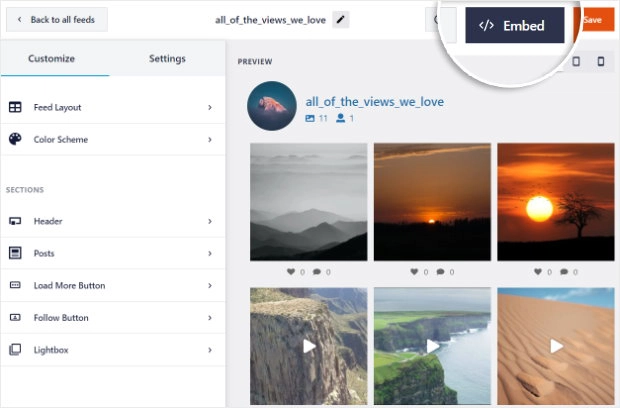
You’ll now see a popup that asks you to choose where you want to embed your Instagram feed. To continue, select Add to a Page here.
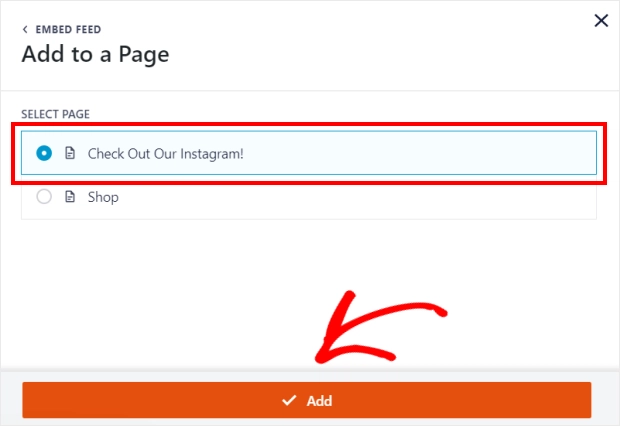
After that, just select the WordPress page from the list and click on Add.
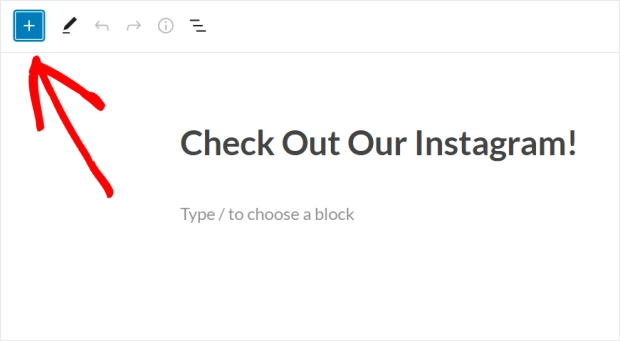
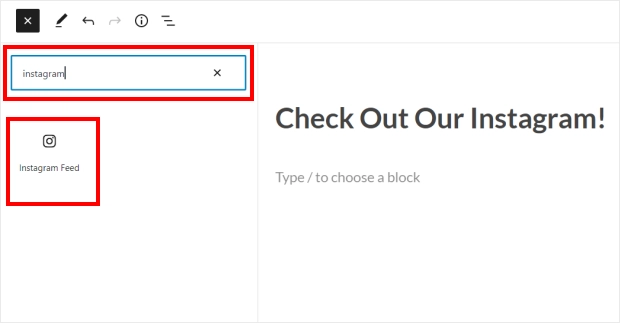
This will open the page in the WordPress editor. Now click the Plus (+) icon to add a new WordPress content block.
After that, enter “Instagram” in the search bar and then click on the Instagram Feed block from the search results.
Now click on the Publish button to save your new Instagram feed.
With that, you’ve added an Instagram feed to your WordPress website. To see how it looks, you can open your site and see.
Now let’s check out the other way to embed Instagram feeds on your website.
Embed Your Instagram Feed on Your WordPress Sidebar or Footer
Instagram Feed Pro also comes with a built-in Instagram widget that you can use to add your feeds to the sidebar or footer areas.
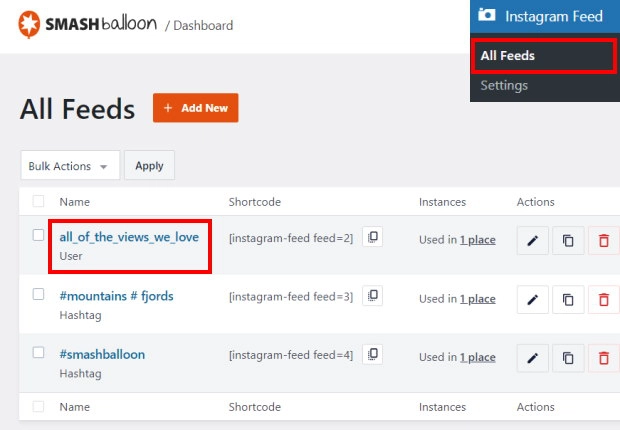
To embed your Instagram feed as a widget, first, open it in the live feed editor. For that, you can go to Instagram Feed » All Feeds from your WordPress dashboard.
Here, click on your Instagram feed from earlier.
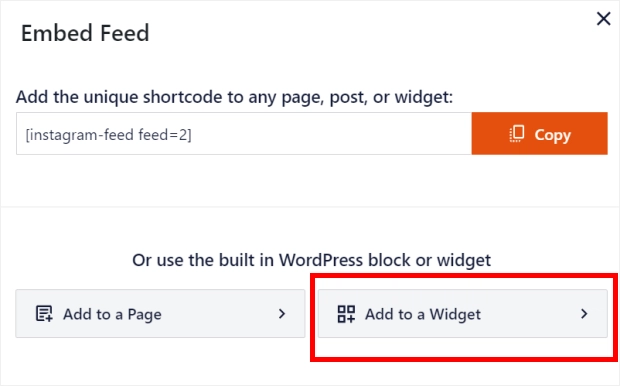
To embed your Instagram feed to WordPress, select the Embed button at the top.

On the new popup, you can choose where to embed your Instagram feed. Just select the Add to a Widget option to continue.
This will open the Widgets page of your website.
To add the Instagram feed to your sidebar, just click on the Sidebar panel on this page.
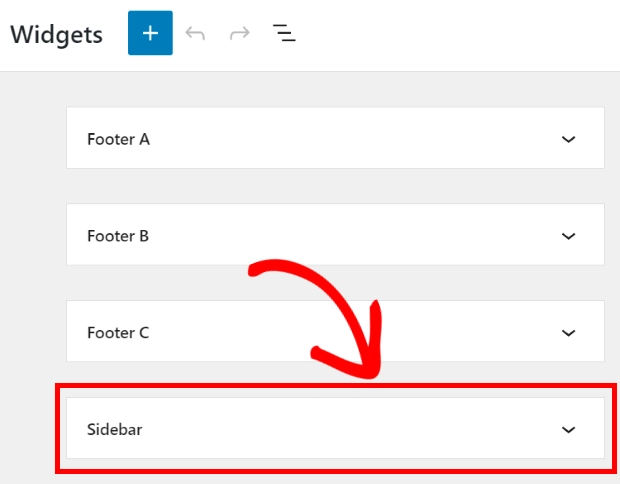
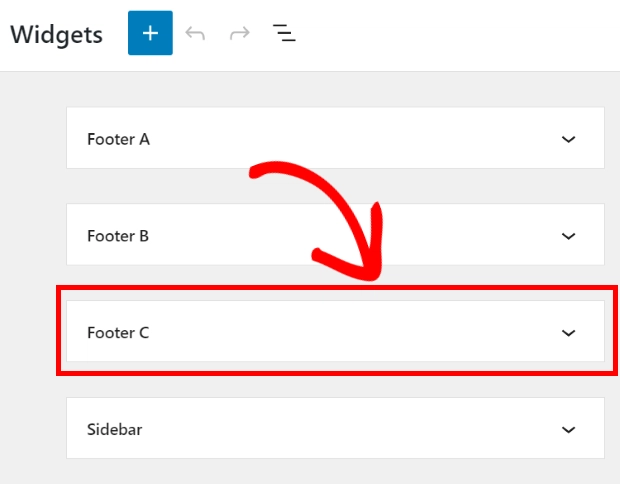
You can also click on a Footer panel instead if you want to embed your Instagram feed there.
For this tutorial, we’ll use the sidebar to embed an Instagram feed.
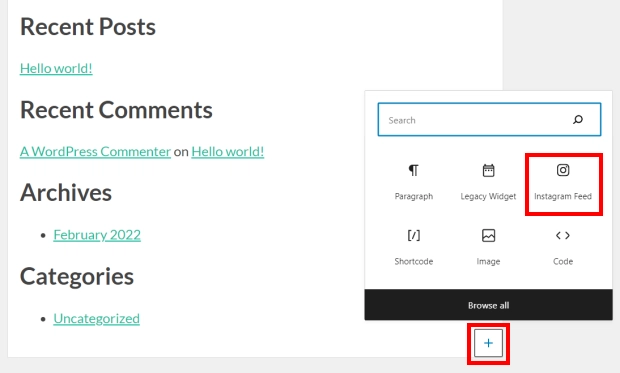
Now, you can see the active widgets on your sidebar or footer area. To add a new widget, click on the plus icon (+) here.
Finally, select the Instagram Feed widget from the options.
Click on Update to save your changes and you’ve now embedded your Instagram feed to a widget-ready area of your site.


