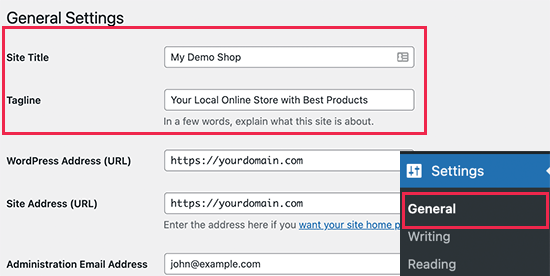
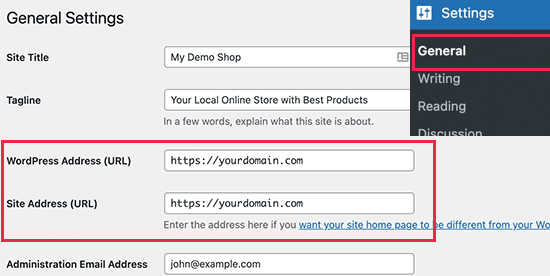
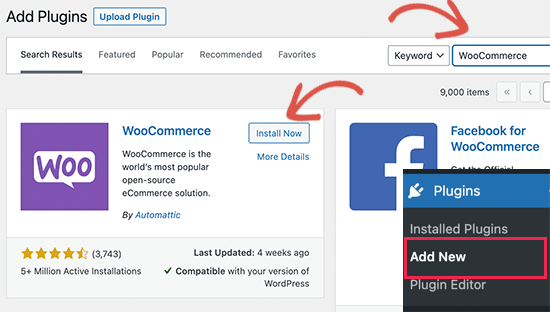
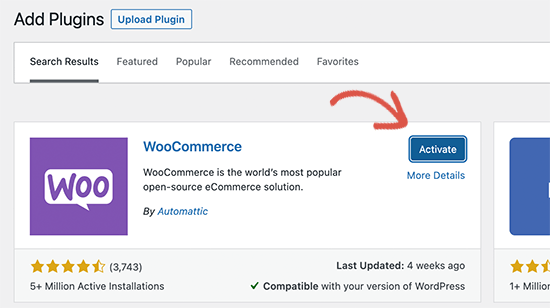
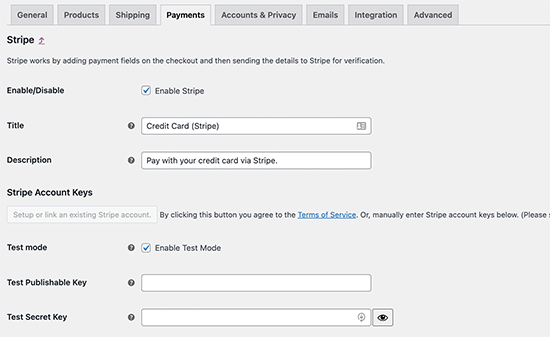
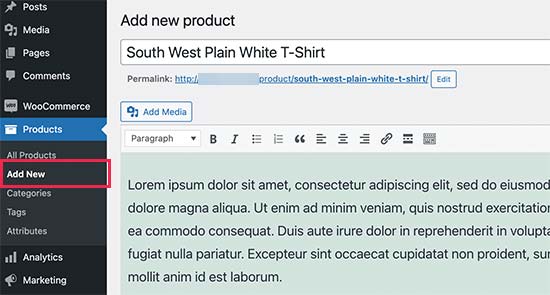
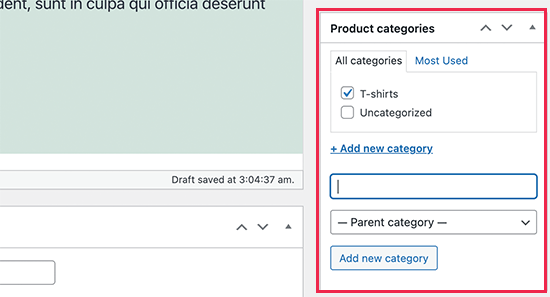
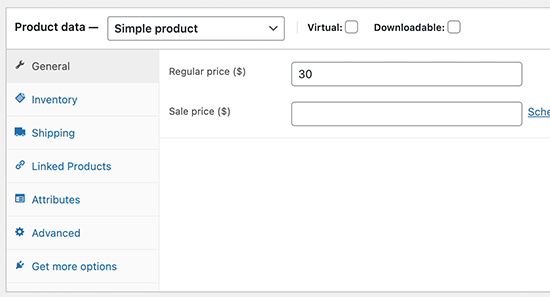
How to Start an Online Store With WordPress?

Do you want to start your own online store? We know that building an online store can be a terrifying thought especially when you are not a techy.

Well, you’re not alone. After helping hundreds of users start their online store, we have decided to create the most comprehensive guide on how to build your online store with WordPress (step by step)

What Do You Need to Start an Online Store?

There had never been a better time to start an online business than today.

  1. A domain name idea (this will be the business name of your online store i.e joydigital.co.il)
  2. A web hosting account (this is where your website lives on the internet) with any hosting company like joydigital hosting company

    Yep, it is really that simple.

    You can setup your own online store with WordPress in less than 30 minutes and we’ll walk you through each step of the process.

    Step 1: Setting up Your Online Store Platform

Let’s go ahead and purchase your domain + hosting + SSL.

The first thing you need to open joydigital.co.il and then go down and click on plan

Once completed your purchasing , you will receive an email with details on how to login to your web hosting control panel (cPanel). This is where you manage everything from support, emails, among other things.

Once you are logged into the cPanel just install wordpress through installatron

Let’s set up your WordPress website.

First, you need to visit Settings » General page to setup your WordPress site title and description.

You can use your store name as site title and provide a catchy description for your business. The description part is optional so don’t worry if you can’t come with something right away.

Setting up HTTPS to Use SSL

Your WordPress hosting package came with a free SSL Certificate. This certificate is pre-installed for your domain name. However, your WordPress site needs to be configured, so it loads as https vs http.

On the Settings » General page, you need to change your WordPress Address and Site Address to use https instead of http.

Step 3. Setting up Your WooCommerce Store

WooCommerce is the best online store builder on the market. It is built on top of WordPress which gives the flexibility of WordPress with freedom to sell any type of products you want.

First, you need to install and activate the WooCommerce plugin.

Simply go to Plugins » Add New page and search for WooCommerce. In the search results, click on the Install Now button next to WooCommerce listing.

WordPress will now fetch and install WooCommerce plugin for you. Wait for it and to finish downloading the plugin and then click on the ‘Activate’ button to continue.

Upon activation, WooCommerce will launch the set up wizard and you’ll see the Welcome to WooCommerce screen. This set up wizard will walk you through important WooCommerce settings.

First, you need to provide basic information for your online store such as address, country, and region. If you are a retailer, then you can add your retail location information as the address.

After that, click on the Continue button to move on to the next step.

Next, you’ll be asked to choose a store industry. You can choose an industry closest to the type of store you want to make.

Click on the continue button to move on.

After that, you’ll be asked to choose the types of products you’ll be selling on your store. For instance, if your products need shipping, then you can choose physical products.

You can also choose multiple product types. For example, you can choose both Physical Products and Downloads too. Don’t worry about selling different product types. You can select which type of product you are adding for each product.

Click on the Continue button.

Next, you’ll be asked to provide some business details like how many products you plan to sell and if you are selling elsewhere. You can choose that I don’t have products yet and select ‘No’ for the other option.

Now, you need to switch to the ‘Free Features’ tab. You’ll see a box pre-checked to install free features for your website.

You need to uncheck this option as it will install several other WooCommerce extensions that you may not need. If you need them later, then you can always install them on your own.

Click on the Continue button for the next step.

Next, you’ll be asked to choose a theme for your online store. You can continue with your current default theme, choose Storefront or any of the free options listed on the page.

Step 4. Setting up Payments for Your Online Store

Next, you need to set up payment methods to accept online payments on your store. WooCommerce provides a bunch of payment gateways that you can easily setup.

Simply go to the WooCommerce » Settings page and switch to the ‘Payments’ tab. By default, you can choose from PayPal Standard, Cash on Delivery, Checks, and Bank Transfers.

Scroll below and you will also see the option to install Stripe, PayPal Checkout, and WooCommerce Payments. We recommend choosing Stripe and PayPal Standard as your payment options.

For each payment gateway, you can click on the Set up button and provide the required information. For instance, you can enable Stripe and enter your API Keys (you can find this information under your Stripe account).

Step 5. Adding Products to Your Online Store

Let’s start with adding the first product to your online store.

You need to visit Products » Add New page to add a new product.

First, provide a title for your product and then some detailed description.

On the right hand column, you will see the ‘Product Categories’ box. Click on the ‘+Add New Product Category’ to create a category for this product. This allows you and your customers to sort and browse products easily.

Scroll down a little and you will notice the Product Data box. This is where you will provide product related information like pricing, inventory, shipping etc.

Below product data box, you will see a box to add product short description. These product descriptions will be used when users are viewing multiple products on a page.

Once you are satisfied with all the product information you have added, you can click on the Publish button to make it live on your website.

Repeat the process to add more products as needed.

daniel chip

For advice from experts

Please leave a phone number and we will be happy to provide you with the perfect solution

Contact us