How to Set up PayPal in WooCommerce
A secure and easy checkout experience is important for the growth and success of an eCommerce store, especially when complicated and lengthy checkout is one of the major reasons for cart abandonment.
There are many different payment gateways available to ease the transaction experience for both your store and your customers. PayPal is one of the popular ones among them.
This article will help you learn how you can set up PayPal in your WooCommerce store
Availability
Easy Integration
PayPal can be easily integrated with WooCommerce by anyone with little or no development knowledge at all.
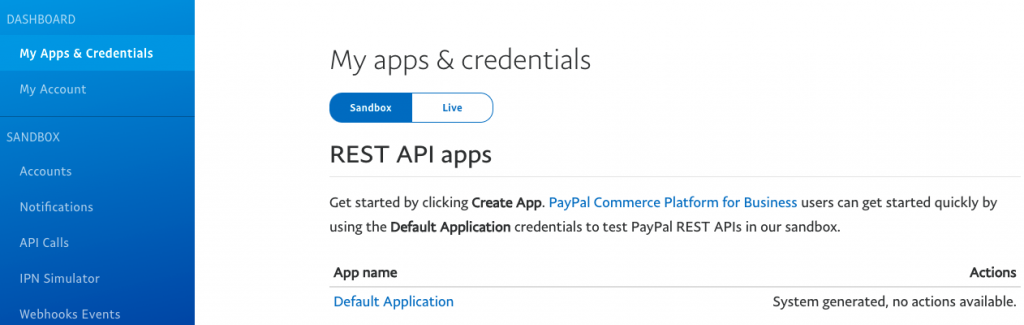
How to Set up a PayPal Sandbox Account
Sandbox mode simulates a live PayPal production environment and lets you initiate a transaction that behaves exactly like a live one so you can test everything is working fine. Following are the steps to create a Sandbox account with PayPal. Follow the below steps to create a sandbox account for your WooCommerce store.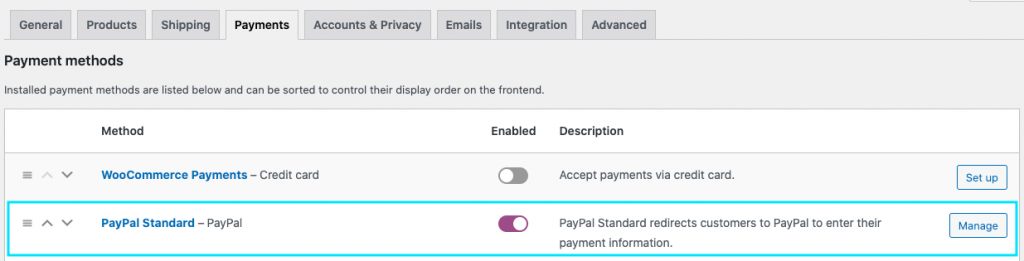
If you haven’t already enabled PayPal standard, enable it and click the corresponding set up/manage button.
Step 2: Enable the PayPal sandbox checkbox
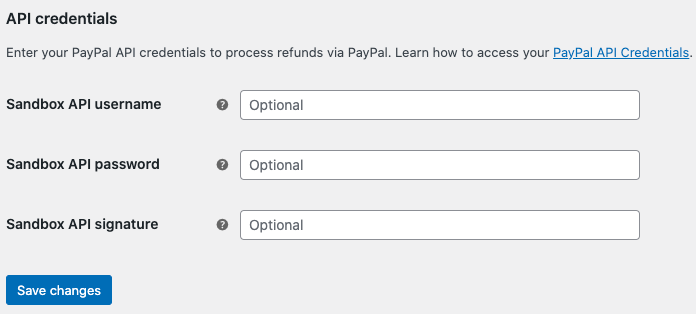
Now if you scroll toward the end of the page, under API credentials, you will be able to view fields to enter Sandbox API username, password, and signature.

Now if you scroll toward the end of the page, under API credentials, you will be able to view fields to enter Sandbox API username, password, and signature.
Step 3: Login to PayPal
Step 4: Open the Accounts tab from the sidebar
Spot the business account and click the view/edit button corresponding to it.
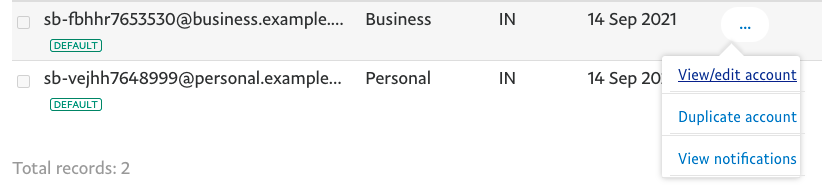
Now from the opening pop-up, you can find the API credentials required for creating a sandbox account.
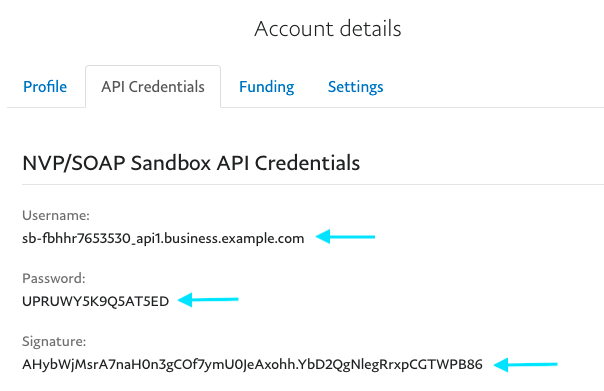
Copy the user name, password, and signature paste them in the corresponding fields within WooCommerce.
Finally, click the Save changes button to finish setting up your PayPal sandbox account.
Copy the user name, password, and signature paste them in the corresponding fields within WooCommerce.
Finally, click the Save changes button to finish setting up your PayPal sandbox account.

Click the Manage button across PayPal standard. It will open a new page with options to configure.
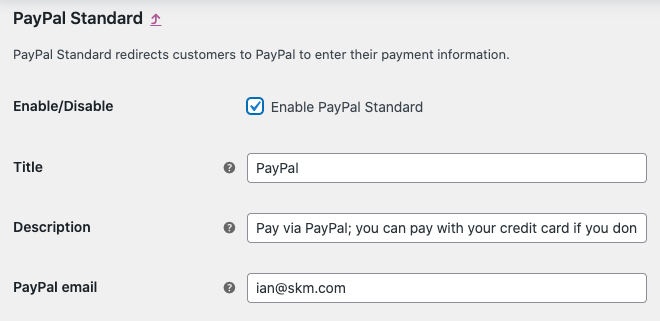
Step 2: Enable PayPal standard and configure the rest of the settings
Once you enable the checkbox, you can give a title and description for how the PayPal checkout should appear on the front-end.
Step 3: Advanced options
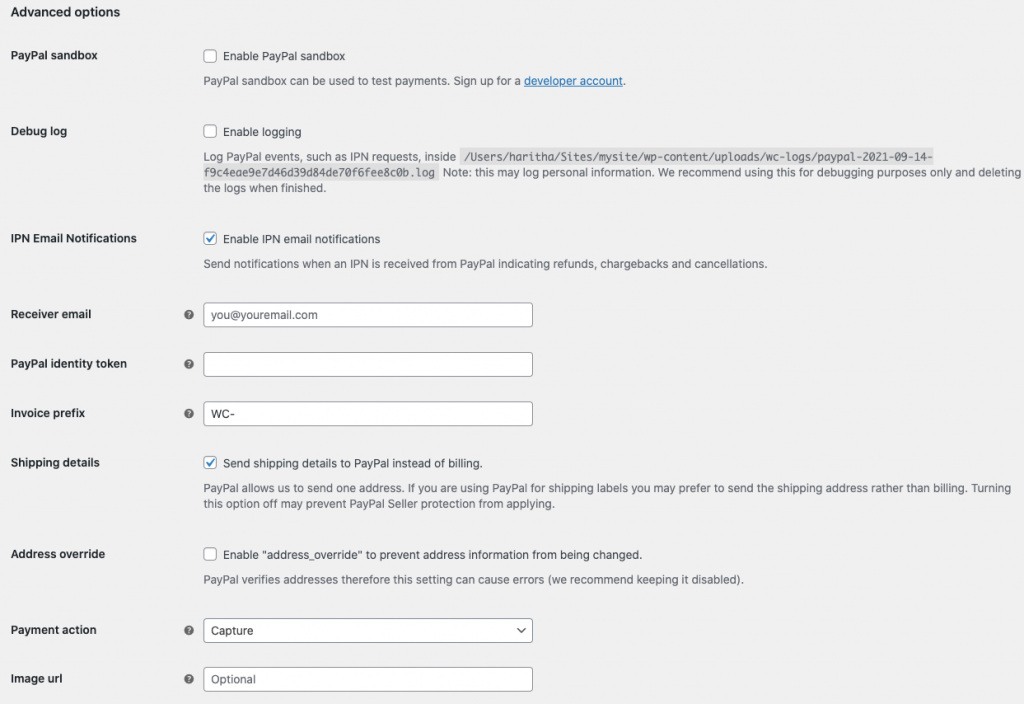
PayPal Sandbox – The sandbox mode creates a testing environment using which you can make test payments. There is a section dedicated to helping you learn how to make sandbox mode work.
Debug logs – By enabling logs you can make debugging easy.
IPN email notifications – Here you can enable instant payment notifications and automatically get notified of events related to PayPal transactions (chargebacks, refunds, cancellations) via your email.
Receiver email – Here you can give the email address to which the notifications should be sent.
Invoice prefix – Here you can add a prefix for your invoice numbers. If you use your PayPal account for multiple stores, you will have to add a unique prefix as PayPal won’t allow orders having the same invoice number.
Step 4: Generate PayPal identity token
The PayPal Identity Token is used to verify payments without using PayPal’s Instant Payment Notification (IPN). This allows customers to track their payment process in a secure channel. Prior to generating a PayPal identity token you need to create an auto-return URL that brings your buyers back to your website immediately after completing a payment. For this, you need to go to the PayPal settings and navigate to website payments in the dashboard.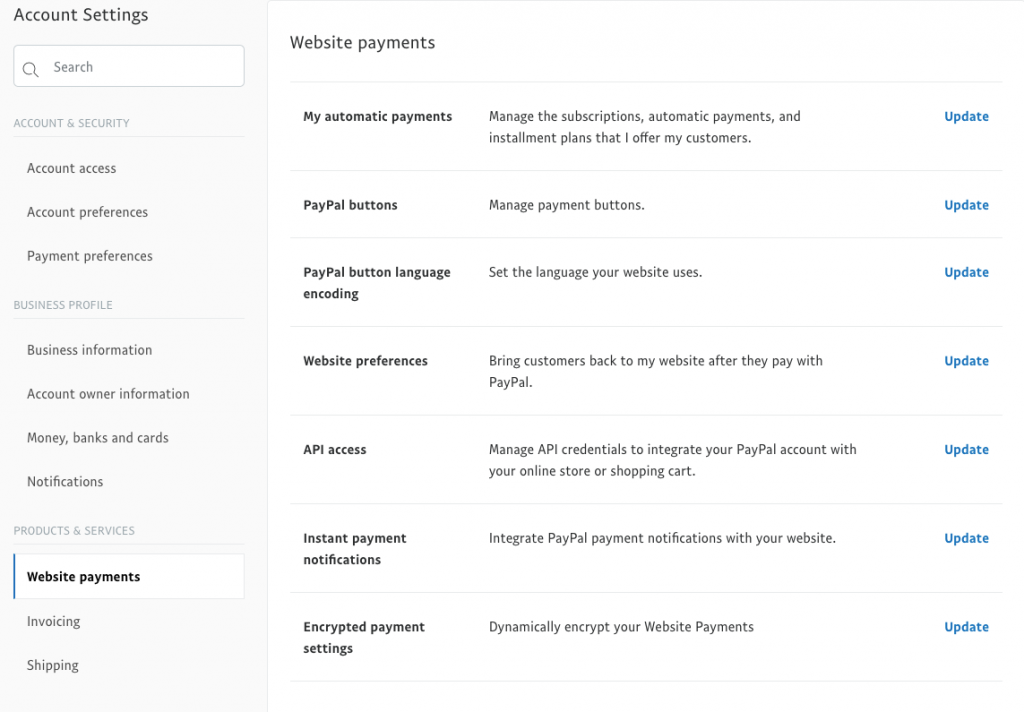
Click the Update button across API access.On the opening page, add the auto-return URL.

Now copy it and paste it into WooCommerce PayPal identity token field.
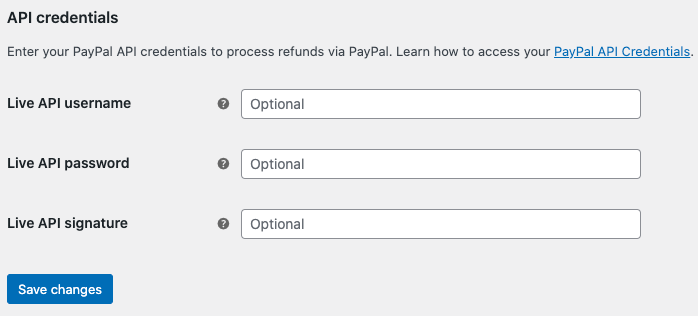
Step 5: Get live API credentials
Here you can add all the API credentials for your PayPal live account. To obtain them you can go to your PayPal dashboard and then Website Payments under the Products & Services sidebar menu. Then, click “Update” on API Access.
Next, scroll down to “NVP/SOAP Integration (Classic)” heading and click “Manage API credentials”.

Now you will be able to find your credentials. You can copy and paste them into the required fields within WooCommerce.