How to Install and Setup WordPress SEO Plugin by Yoast
Yoast SEO is the most comprehensive WordPress SEO plugin with many built-in tools and features. Here is a quick overview of some of those features.
- Change post’s SEO title and meta description on a per post basis.
- Title and meta description support for taxonomies
- Google search result snippet previews.
- Focus keyword testing.
- Meta Robots configuration:
- Easily add noodp, noydir meta tags.
- Easily noindex, or nofollow pages, taxonomies or entire archives.
- Improved canonical support, adding canonical to taxonomy archives, single posts and pages and the front page.
- RSS footer / header configuration.
- Permalink clean ups, while still allowing for Google Custom Search.
- Breadcrumbs support, with configurable breadcrumbs titles.
- XML Sitemaps with:
- Images
- Configurable removal of post types and taxonomies
- Pages or posts that have been noindexed will not show in XML sitemap (but can if you want them too).
- XML News Sitemaps
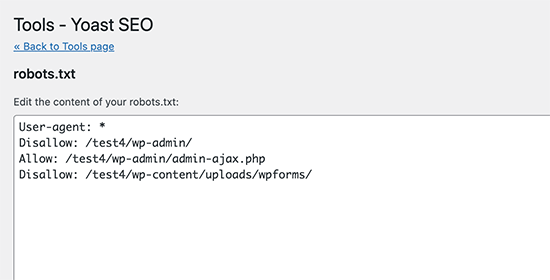
- .htaccess and robots.txt editor
How to Install Yoast SEO Plugin
First, thing you need to do is install and activate the Yoast SEO plugin.
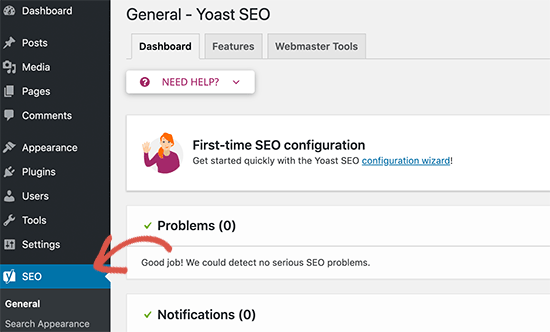
Upon activation, you’ll notice a new menu item in the WordPress admin bar labeled SEO with the Yoast SEO logo on it.
How to Setup WordPress SEO Plugin by Yoast
You should remember, that the settings that we select are the ones that we recommend. Other experts may have their own preferences and discretion, so advanced users can ignore anything that they do not like. If you are a beginner, and you want to use Yoast’s WordPress SEO plugin as we do, then please follow along with the steps carefully.Step 1. Import your SEO Data
If you are setting up Yoast SEO on a new WordPress website or blog, then you can skip this step. Other users, who are installing it on an existing website may have been using some other Other users, who are installing it on an existing website may have been using some other WordPress plugin for SEO like All in One SEO for WordPress, or a theme framework like Genesis dealing with your SEO data. If you want to successfully use this plugin, then you need to make sure that all of your previous data has been transported to this plugin before you deactivate the other one. To accomplish this, we recommend using SEO Data Transporter plugin. It allows you to easily transport your SEO data between popular SEO plugins.Step 2. General Settings
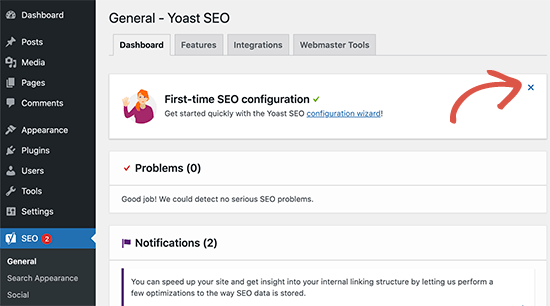
Clicking on the SEO icon takes you to the settings page for the plugin. Switch to the ‘General’ tab and you will notice a button to open the configuration wizard. We want you to ignore this wizard, because we will be taking you step by step through each option.
Step 3. Features
Yoast SEO comes with a lot of features. This page allows you to easily turn those features on and off. By default, all options on this page are turned on.
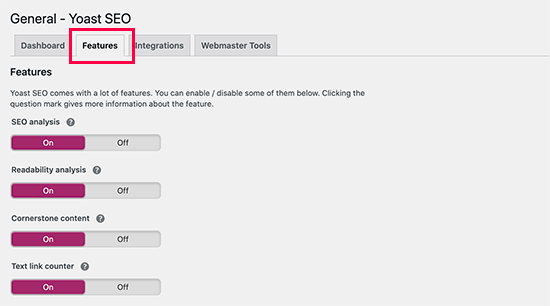
We’ll talk about some of them later in this article. For now, let’s take a quick look at each item and what it does.
- SEO analysis : Shows the SEO score and analysis for your content.
- Readability analysis : Shows the readabity analysis and score for your content.
- Cornerstone content : This feature allows you to mark and filter cornner stone content. These are your most important pillar articles.
- Text link counter : This feature shows the number of internal text links to and from and article.
- XML sitemaps : Creates XML sitemaps for your website.
- Admin bar menu : Shows Yoast SEO menu in the WordPress admin toolbar.
- Security: no advanced settings for authors : Hides advanced SEO settings from authors to improve security.
- Usage tacking : Allows plugin author to track some usage data. It is turned off by default.
- REST API: Head endpoint : This Yoast SEO REST API end point allows you or anyone else to fetch SEO data for specific WordPress post or page. We recommend that you turn this feature off if you are not building a headless WordPress site.
- Enhanced Slack sharing : This feature adds an author byline and reading time estimate to the article’s snippet when shared on Slack.
Don’t forget to click on the Save changes button to store your settings.
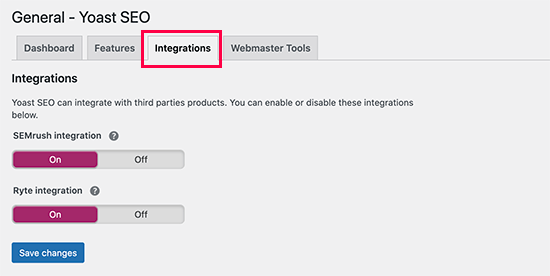
Step 4. Integrations
Yoast SEO offers built-in integration for SEMRush and Ryte platforms.
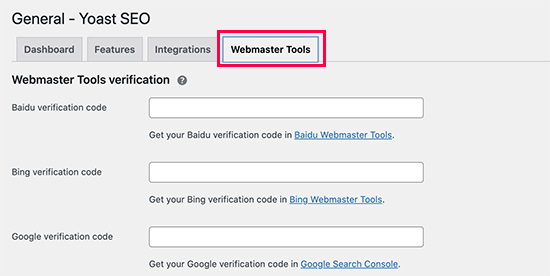
Step 5. Webmaster Tools
Popular search engines allow site owners to add their sites using webmaster’s tools area.
Yoast SEO makes it easier to verify your website with all top search engines. In order to do that you need to sign up for webmaster tools program for each search engine.
After that, you’ll be asked to add a meta tag to verify your ownership of the website. Simply add the meta code that you received from the search engines in the respective fields.
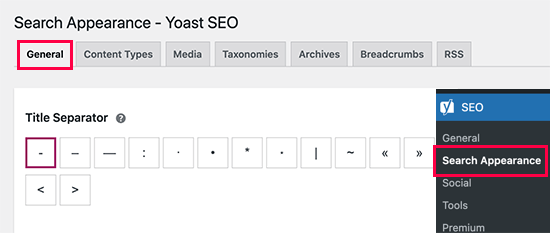
Step 6. Search Appearance
Search Appearance in Yoast SEO settings controls how your website appears in search results. This includes several options for your homepage, single articles, archives, and taxonomies.
We’ll walk you through each one of them. Let’s start with the general settings first,
1. General
Here you can choose the symbol you want to use a separator between titles. The default option is a dash, you can use it if you are unsure which symbol to choose.
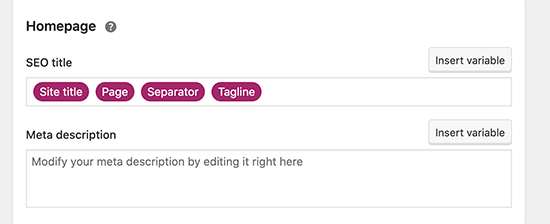
Note: If you are using a static home page, then you can set the homepage title and description by editing the page individually.
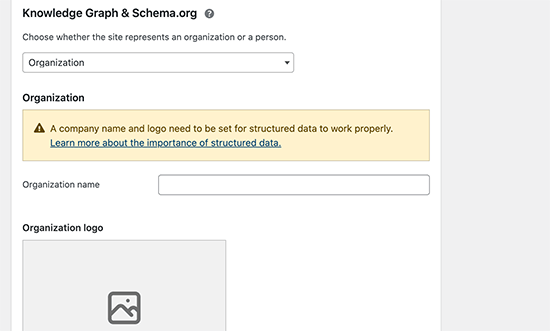
You can also upload a profileo picture for the individual or a website logo for a business.
2. Content Types
You can choose an SEO title and description for each post or page that you write. Yoast SEO also allows you to set up an automatic template to use for them.
In case you forget to add them manually, these options will allow Yoast SEO to use default settings to automatically fill in those options.
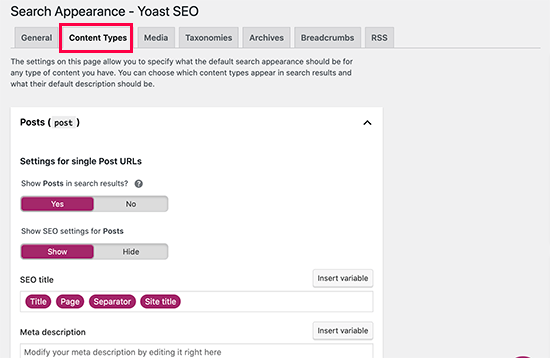
You will be able to set search appearance and whether or not to show SEO meta box for each content type. The default options would work for all websites.
After that, you can set SEO title template and a default meta description.
However, we recommend you only tweak the SEO title and leave the meta description field blank. This would allow Yoast SEO to dynamically generate a description from the first few lines of your article.
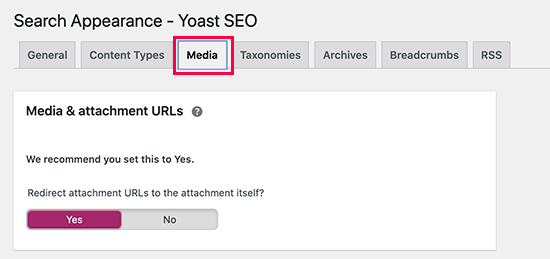
3. Media
By default, WordPress creates a new page for each image or media you attach to your posts and pages. This page only displays the attachment media.
Those attachment pages have no significant text to provide search engines a context. Such pages are considered low-quality content by search engines and have a negative SEO impact.
Yoast SEO helps you fix that by redirecting users to the attachment file instead of the attachment page. This option is set to ‘Yes’ by default and you don’t need to change it.
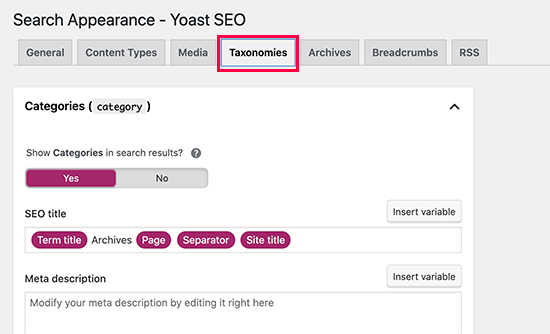
4. Taxonomies
On the taxonomies tab, you can configure titles and meta for categories, tags, custom taxonomies, and post format archives.
Default template variables should work for most sites. As for descriptions, please remember that Yoast SEO picks up descriptions from your categories and tags.
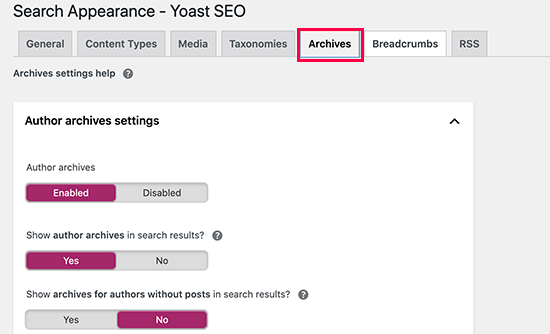
5. Archives
The Archives tab allows you to control search appearance options for miscellaneous archive pages on your website. This includes author, date, search, and 404 pages.
The default options will work for most websites. However, if you run a single author blog, then you need to disable author archive pages from search engines.
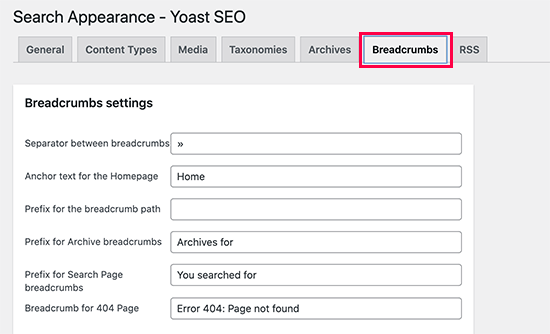
The default settings should work for most websites, but if you want to change something then go ahead and make your changes.
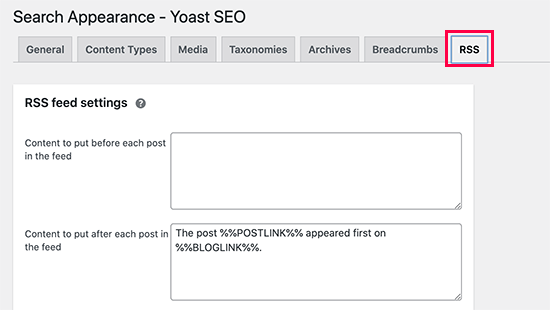
7. RSS
RSS Feeds are often used by content scrapers to copy content from your website. Yoast SEO allows you to add a backlink to your own site for each post in your RSS feed.
Step 7. Social
As we said earlier, Yoast SEO is a powerhouse packed with many features to provide comprehensive optimization.
One great feature of the plugin is that it integrates your site with Facebook, Twitter, Pinterest, and other platforms.
Clicking on the Social link under the SEO menu will take you to set up these platforms. We will show you how to configure each of them.
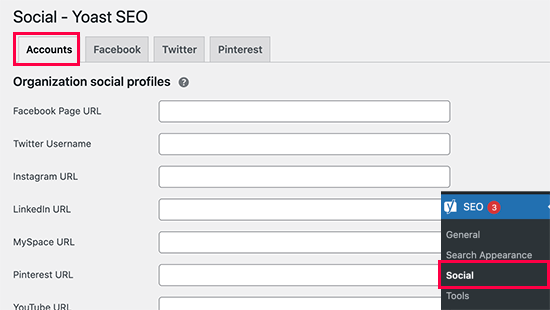
1. Accounts
The first tab under the social settings is for all your social accounts. This allows Yoast SEO to tell Google about your social profiles. You need to simply add the URLs and Twitter username for the main social profiles of your site.
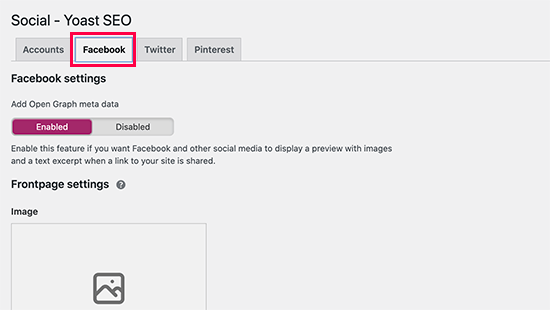
2. Facebook
You need to make sure that open graph metadata option is enabled under the Facebook tab. It allows Yoast SEO to add Facebook open graph metadata in your website’s <head> section.
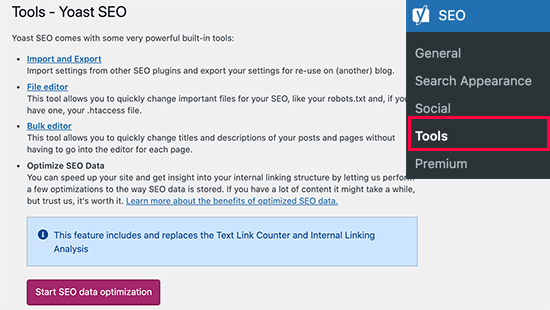
Step 8. Tools
Yoast SEO comes with some built-in tools that allow you to perform some advanced tasks. Most beginners may not need to use these tools. However, we will show you each tool and what it does.
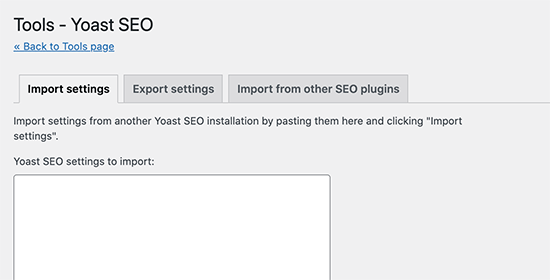
1. Import and Export
If you previously used another WordPress SEO plugin or a theme with built-in SEO functions, then you can use this tool to import SEO data
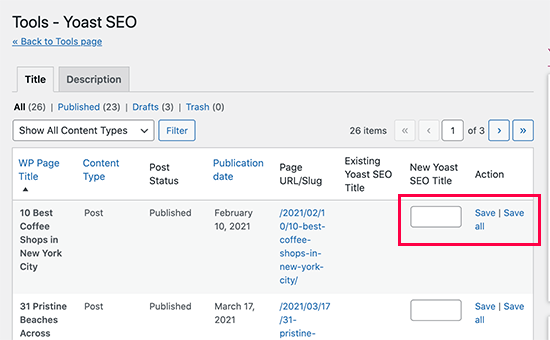
3. Bulk editor
The bulk editor tool in Yoast SEO allows you to quickly add SEO title and description for all your blog posts and pages.
Under the Titles tab, you will find a blank field to add your new SEO title for that blog post. After that click on Save link to store your changes.
XML sitemaps in the Yoast SEO plugin
The XML sitemap feature
Follow these steps to enable the XML sitemaps feature:
- Log in to your WordPress website.
When you’re logged in, you will be in your ‘Dashboard’.
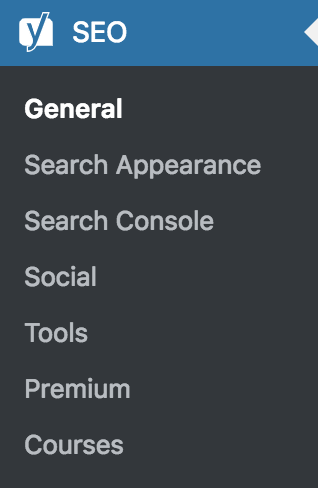
- Click on ‘SEO’
On the left-hand side, you will see a menu. In that menu, click on ‘SEO’
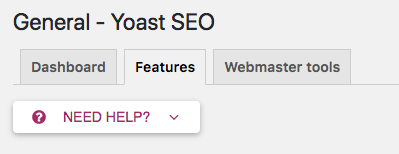
- Click on ‘General’.
The ‘SEO’ settings will expand providing you additional options. Click on ‘General’.

Click on the ‘Features’ tab.

To enable the feature, toggle the switch to ‘On’. To disable the feature, toggle the switch to ‘Off’.
View the sitemap
- Log in to your WordPress website. When you’re logged in, you will be in your ‘Dashboard’.
- Click on ‘SEO’. On the left-hand side, you will see a menu. In that menu, click on ‘SEO’
- Then, click on ‘General’. Clicking on General will open the General – Yoast SEO settings.
In the Yoast SEO General settings, click on the ‘Features’ tab.
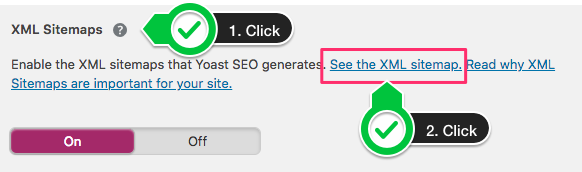
- Click the question mark for the XML Sitemap feature.
- Then, click ‘See the XML sitemap.’
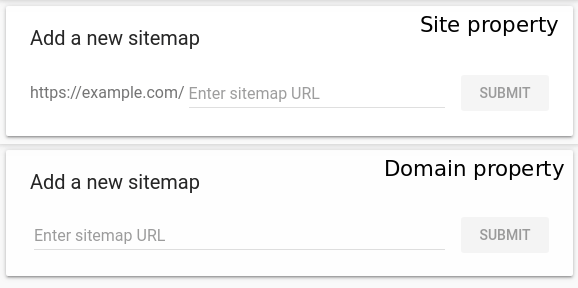
How to submit your sitemap to Google Search Console
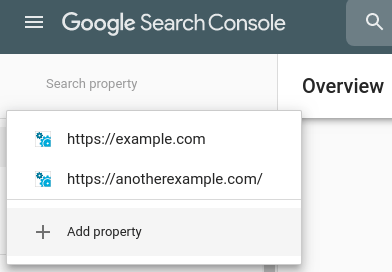
- Sign in to Google Search Console.
- In the sidebar, select your website.
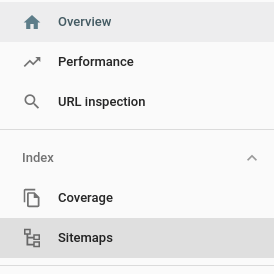
Click on ‘Sitemaps’.
The ‘Sitemaps’ menu is under the ‘Index’ section. If you do not see ‘Sitemaps’, click on ‘Index’ to expand the section.
- Remove outdated or invalid sitemaps (if any) like sitemap.xml
- Enter ‘sitemap_index.xml’ in the ‘Add a new sitemap’ field to complete the sitemap URL.