Customize your website Appearance
Introduction
Depending on the theme you’re using for your WordPress site there are a different set of changes you can make to your site from within your admin panel. This tutorial explains how to do some of the changes to your site using the Customization page. For the purpose of this tutorial, we will use the Twenty Nineteen theme.
How to Access the WordPress Customization Page
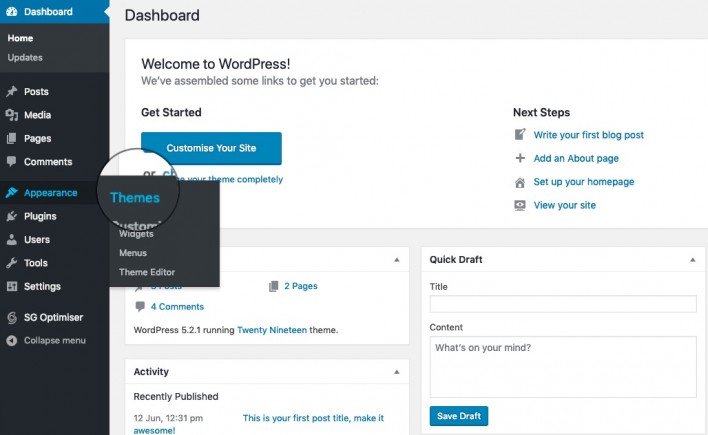
To start customizing your WordPress theme, go to Appearance > Themes.
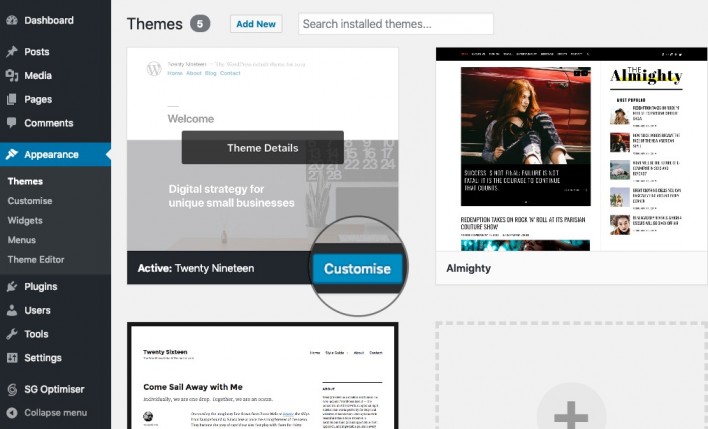
On this page, locate the active theme (Twenty Nineteen in our case) and click on Customize next to its title.
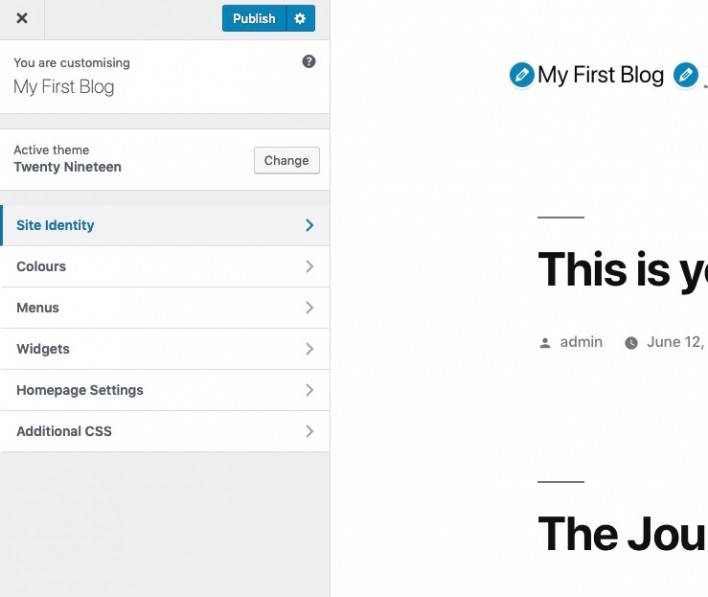
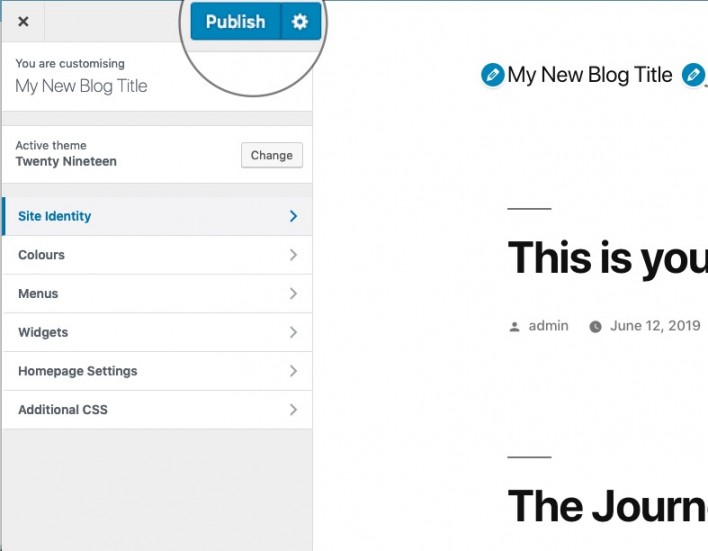
On the page that opens, you can modify your WordPress theme in real time. On the left you will see a list of the available options and on the right a live preview of your site and how those changes will affect it.
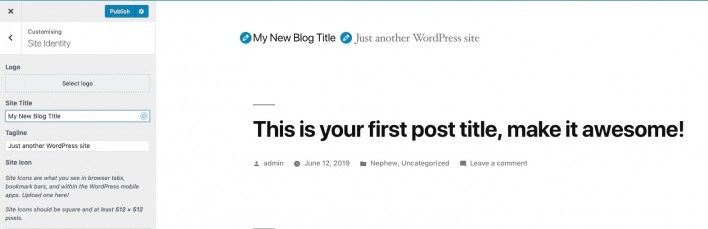
How to Modify your WordPress Title and Tagline
The theme customization page allows you to modify your site’s title and tagline and see how it will look on your actual site immediately. To do this, expand the Site Identity group of settings and alter the text. As you type you will see the new text showing up in the preview on the right side. Once you’re happy with the result, click on Publish.
Additional WordPress Theme Customizations
Depending on the theme you’re using there might be additional options in that page. For example, the Twenty Nineteen theme allows you to modify the header image, color scheme, add additional CSS and more. Once you’re happy with the result, click on Publish to save the changes.
Choose Your Logo and Favicon
Next, you can choose your logo and favicon (or site icon). Doing this allows you to further customize your WordPress site with your own personal or company brand.
Go to Appearance, then Customize, and click on the Site Identity section. Here you can upload your logo, as well as choose your site title and tagline.
Widgets
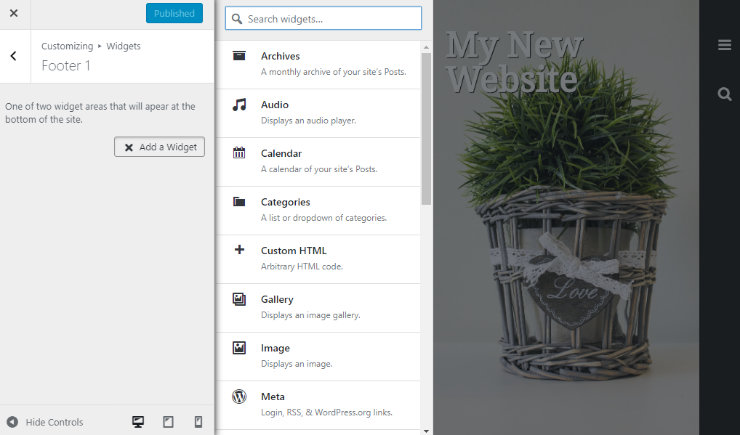
You can also customize your WordPress site or blog with widgets. A WordPress widget is a small block that performs a specific function. You can add these widgets to numerous areas of your website including sidebars, footers, and other widget-ready areas, depending on your WordPress theme.
To add a widget, go to the Customizing section and click on Widgets. Next, click on the area where you want to add a website, then click on the Add a Widget button.
Customize Your User Profile
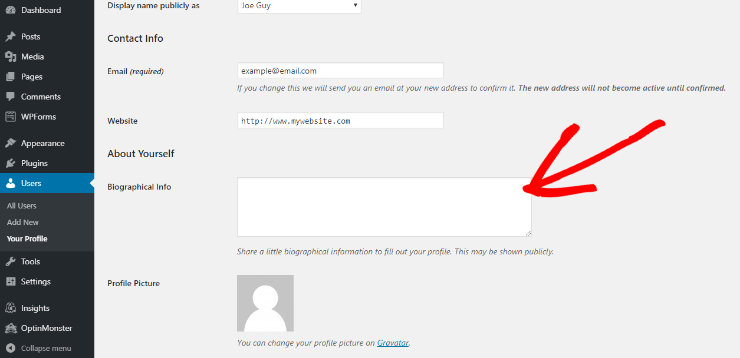
To customize your user profile, in the WordPress admin dashboard go to Users, then click on Your Profile. Here you can set your color scheme preferences, your name, nickname,what you want to display your name publicly as, and so on. You can also write a bit about yourself in the Biographical Info area and set your profile photo with Gravatar. Click on the Update Profile button to save your changes.
Build Your WordPress Pages
Any website needs pages, it’s rare to see a website with only 1 page. So, you need to create all of the pages you need for your website. The most common pages people create include:
- Home
- About
- Services/Products
- Portfolio
- Client Testimonials
- Content Archive/Blog
- Contact
- FAQ/Support
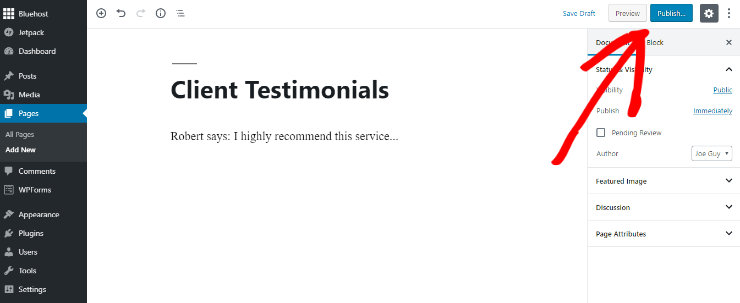
Decide what pages you need for your WordPress site and start creating them. To create a page, go to Pages, and then click on the Add New button. A new page will open up. Here you can name your page, add all of the content for the page, and click Publish when you’re done creating the page and happy with how it looks.
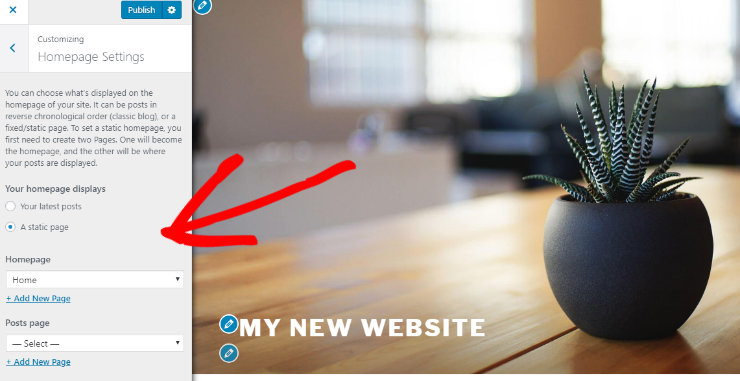
You’ll also want to set your homepage. Typically, WordPress sets your homepage to display your latest posts by default. Which may be fine if you’re a blogger, but many website owners would prefer a proper homepage. So, to set your homepage, in your WordPress dashboard, go to Appearance, then Customize. From this menu, choose Homepage Settings. Here you can select the option to display your homepage as a static page, then from the dropdown list under Homepage, choose the page you created that you want to be your homepage.
Set up Menu Structure
To do this, in the WordPress admin dashboard, go to Appearance, then Menus. Here, on the left side, you’ll see a list of all of the pages you have published on your WordPress website. First, choose a name for your menu and click the Create Menu button. Then, simply add a check mark to the pages you want to add to your menu, then click the Add to Menu button.
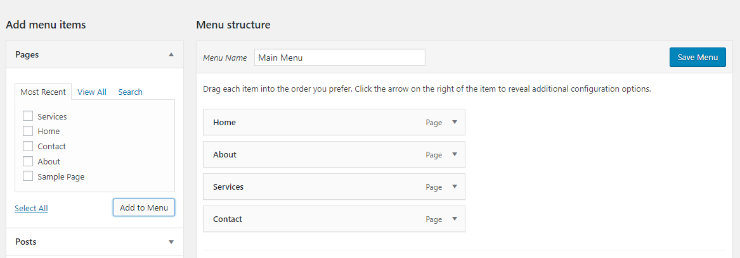
Your pages will then appear on the right side of the screen underneath the menu you created. Now you can drag and drop the pages to put them in the order you like.
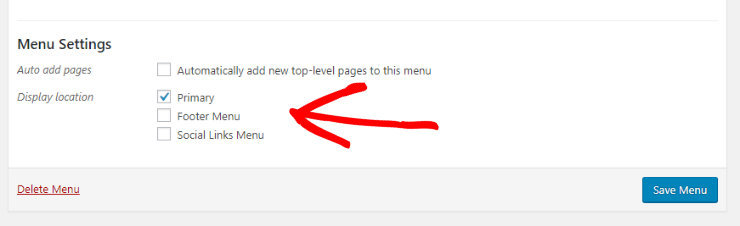
Finally, choose the display location for your menu. The most common choice is primary, which is at the top of the top. But you can also display your menu in the footer and other locations if you wish.
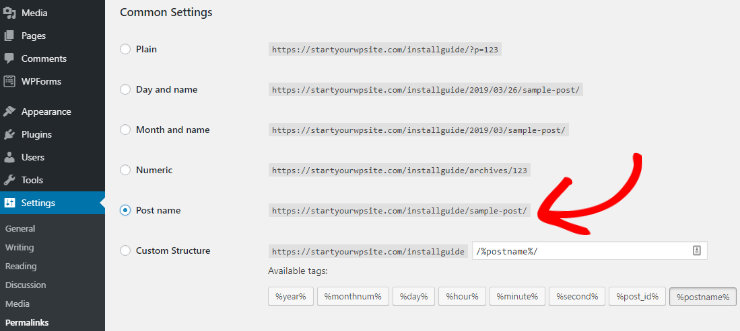
Change Permalinks
A permalink is the web address used to link to your content. You’ll want to set descriptive URLs for your posts and pages to boost SEO and also to make them more enjoyable and easy to understand for your website visitors.
WordPress offers a number of options for permalinks including plain, numeric, etc. but these options are not all optimized for SEO. So, go to your WordPress admin dashboard, to Settings, and then Permalinks. Here, you can choose the Post name option.
After customizing our WordPress site and getting it to look and perform exactly how you want, the work’s not over yet. Before showing your website to the world, you need to do some tests first.
The first test you should perform is to make sure everything looks right. Visit your website in different browsers and check to see that everything is where it should be.
You also need to make sure your website is mobile-friendly.


